


valutazioni - 3, GPA: 3.7
(

 )
)
|
Foto e specifiche Yamaha NS-PA150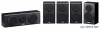 |


Facilità d'uso
If the surface is dirty, oily or wet, adhesive strength is weakened and the speaker may fall. * Front left Front right 2 En Installing the speakers Wall-mounting the speakers You can mount the speakers on the wall as follows. 1 Install screws into a solid wall or wall support as shown in the illustration. Use 3.5 to 4 mm (1/8") diameter self-tapping screws. 2 Hang each speaker by its keyhole slots onto the protruding screws. Note • Make sure the shaft of the screw is seated in the narrow part of the keyhole slot. Otherwise, the speaker may fall. Warnings • NS-B150 speaker weighs 1.2 kg (2.6 lbs.) and NS-C150 speaker weighs 2.1 kg (4.6 lbs.). Do not mount the speakers on thin plywood or on a wall with a soft surface material. Otherwise, the screws may pull out of the surface and the speakers may fall, possibly damaging the speakers or causing personal injury. • Do not affix the speakers to a wall using nails, adhesives, or unstable hardware. Long-term use and vibration may cause the speakers to fall. • To avoid accidents resulting from tripping over loose speaker cables, affix the cables to the wall. • Mount the speakers in a wall location that will be unlikely to result in injury to an individual’s head. • When using speaker brackets (commercially available) to mount the speakers on the wall or ceiling, we strongly recommend using safety wire (may be supplied with the bracket) between the speaker and bracket to prevent the speaker from falling. • When installing these speakers on a wall mounted bracket, it is essential that they are firmly secured. Be sure to consult a reliable source about the best type of fastener for your particular wall / ceiling’s construction. ■ Mounting the center speaker on the Yamaha YTS-F500/YTS-T500 TV stand You can use the screw holes [diameter: 6 mm (1/4"), hole depth: 16 mm (5/8”)] on the rear of this unit to mount the speaker on the YTS-F500/YTS-T500. For installation details, please refer to the owner’s manual that came with the YTS-F500/YTS-T500. NS-C150 Rear view 290 mm (11-1/2" Notes • Be careful not to pinch the speaker cables between the speaker and the speaker bracket or speaker stand. • Do not lean or place any object on the speaker. Otherwise, the TV stand bracket may be deformed. 3 En English Connecting the speakers Connecting the speakers Caution: Make sure the power cables for your other AV components are disconnected from the AC wall outlets before making any connections. Connection diagram Front speakers Right Left Center speaker ■ Preparing the speaker cables Once you’ve positioned the speakers, you’ll need to prepare the speaker cables for connecting the speakers. 1 Remove about 15 mm (5/8") of insulation from the end of each speaker cable. 2 Twist the bare wires tightly. V Good No Good Notes • Do not bundle or roll up excess cable. • Twist the bare wires tightly so the individual strands are not splayed. • Be careful not to injure yourself while preparing the speaker cables. 15 mm...
Questo manuale è adatto anche per i modelli :Altoparlanti - NS-P150 (4.93 mb)
Strumenti Musicali - NS-PB150 (4.93 mb)