


valutazioni - 6, GPA: 3.7
(

 )
)
|
Foto e specifiche Sony XR-CA800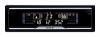 |


da questo dispositivo ha anche altre istruzioni :

Unità - XR-CA800 (2.12 mb)
Unità - XR-CA800 (428 kb)
Facilità d'uso
You can enter up to 8 characters for a disc. If you label a CD, you can locate the disc by name (page 23). 1 Start playing the disc you want to label. 2 Press (menu), then press either side of (disc) repeatedly until “NAMEEDIT” appears. 3 Press (enter). The unit will repeat the disc during the labelling procedure. 4 Enter the characters. O Press the (+)*1 side of (disc) repeatedly to select the desired character. A t B t C ... t 0 t 1 t 2 ... t + t --1 * ... t _*2 t A *1 For reverse order, press the (-) side of *2 (blank space) Q Press the (+) side of (seek) after locating the desired character. (yk) If you press the (-) side of (SEEK), you can move back to the left. © Repeat steps O and Q to enter the entire name. 5 To return to normal CD play mode, press (enter). 22 Tips • Simply overwrite or enter “_" to correct or erase a name. • There is another way to start labelling a CD: Press (list) for 2 seconds instead of performing steps 2 and 3. You can also complete the operation by pressing (list) for 2 seconds instead of step 5. • You can label CDs on a unit without the CUSTOM FILE function if that unit is connected along with a CD unit that has the function. The Disc Memo will be stored in the memory of the CD unit with the CUSTOM FILE function. Note REP-1/shuffle play is suspended until the Name Edit is complete. Viewing the Disc Memo As a display item, the Disc Memo always takes priority over any original CD TEXT information. To Press View ( DSPL/PTY ) during CD/CD TEXT disc playback Tip To find out about other items that can be displayed, see page 21. Erasing the Disc Memo 1 Press (source) repeatedly to select “CD.” 2 Press (mode) repeatedly to select the CD unit storing the Disc Memo. 3 Press (menu), then press either side of (disc) repeatedly until “NAME DEL” appears. 4 Press (enter). The stored names will appear in order from the earliest entered. 5 Press either side of (disc) repeatedly to select the disc name you want to erase. The stored names will appear from the earliest ones entered. 6 Press (enter) for 2 seconds. The name is erased. Repeat steps 5 and 6 if you want to erase other names. 7 Press (menu) twice. The unit returns to normal CD play mode. Notes • When the Disc Memo for a CD TEXT disc is erased, the original CD TEXT information is displayed. • If you cannot find the Disc Memo you want to erase, try selecting a different CD unit in step 2. Locating a disc by name — List-up (For a CD unit with the CD TEXT/ CUSTOM FILE function, or an MD unit) You can use this function for discs that have been assigned custom names*1 or for CD TEXT discs*2. *1 Locating a disc by its custom name: when you assign a name for a CD (page 22) or an MD. *2 Locating discs by the CD TEXT information: when you play a CD TEXT disc on a CD unit with the CD TEXT function. 1 Press (list). The name assigned to the current disc appears in the display. =0fn -5lh n I I I I I I 111 \ 2 Press either side of (disc) repeatedly until you find the desired disc. 3 Press (enter) to play the disc. Note Some letters cannot be displayed (exception: Disc Memo). I: I dul h n I u^J U]IEF?T-,;M= 23 Selecting specific tracks for playback — Bank (For a CD unit with the CUSTOM FILE function) If you label the disc, you can set the unit to skip or play the tracks of your choice. 1 Start playing the disc you want to label. 2 Press (menu), then press either side of (disc) repeatedly until “BANK SEL” appears. '//II I \ s~ 4 Label the tracks. o Press either side of (seek) repeatedly to select the track you want to label. 2 Press (enter) repeatedly to select “PLAY” or “SKIP.” 5 Repeat step 4 to set “PLAY” or “SKIP” for all the tracks. 6 Press (menu) twice. The unit returns to normal CD play mode. Notes • You can set “PLAY" and “SKIP" for up to 24 tracks. • You cannot set “SKIP" for all the tracks on a CD. Playing specific tracks only You can select: • “BANK-ON” — to play the tracks with the “PLAY” setting. • “BANK-INV” (Inverse) — to play the tracks with the “SKIP” setting. 1 During playback, press (menu), then press either side of (disc) repeatedly until “BANK-ON,” “BANK-INV,” or “BANK-OFF” appears. 2 Press the (+) side of (seek) repeatedly until the desired setting appears. 3 Press (enter). Playback starts from the track following the current one. To return to normal play mode, select “BANK-OFF” in step 2. 24 Additional Information Maintenance Fuse replacement When replacing the fuse, be sure to use one matching the amperage rating stated on the original fuse. If the fuse blows, check the power connection and replace the fuse. If the fuse blows again after replacement, there may be an internal malfunction. In such a case, consult your nearest Sony dealer. Replacing the lithium battery Under normal conditions, batteries will last approximately 1 year. (The service life may be shorter, depending on the conditions of use). When the battery becomes weak, the...