


valutazioni - 3, GPA: 4.3
(

 )
)
|
Foto e specifiche Canon PowerShot S200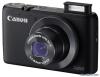 |


Facilità d'uso
If the image is dark, adjust the exposure to a positive value. Similarly, adjust the exposure to a negative value to darken a bright image (p. 64). HistogramExamples Dark Image Balanced Image Bright Image Basic Functions Using the Viewfinder The optical viewfinder can be used to conserve power while shooting. Aim the square brackets (autofocus metering field) inside the viewfinder at the primary subject to shoot. The field of vision is approximately 82% at the maximum telephoto setting. AF Brackets Viewfinder • About the Autofocus Function This camera employs AiAF (artificial intelligence autofocus) technology which uses a broad metering field to calculate the focal distance with high precision. It delivers a crisp focus even when the photographic subject is slightly off-center. The AiAF function can be turned off so that the autofocus is metered from a fixed AF frame at the center of the field to accommodate difficult shooting conditions (p. 62). • Image Seen in Viewfinder vs. Recorded Image Please note that the actual image may differ from the image seen in the optical viewfinder due to the physical separation between the viewfinder and lens. This is called the parallax phenomenon and is more noticeable the closer the subject is to the lens. In some cases, portions of images shot up close that appear in the viewfinder will not appear in the recorded image. You are recommended to use the LCD monitor to shoot images up close. Basic Functions Pressing the Shutter Button The shutter button features a two-stage action. Pressing Halfway Pressing halfway automatically sets the exposure, focus and white balance. • Indicator Status Upper Indicator -Green: Metering complete (two beeps sound) -Orange: Flash will fire -Flashing Orange: Camera shake warning/ Insufficient exposure Lower Indicator -Yellow: Macro mode/Infinity mode/Focus lock (Method 2, p. 58) -Flashing Yellow: Focusing difficulty* (single beep sounds) * When the indicator flashes yellow, lock the focus before shooting (p. 58). • AF Frame Status (LCD Monitor On) AiAF On -Green Frame: Metering complete (AF frame when focus achieved) -No Frame: Focusing difficulty AiAF Off (Center AF Frame) -Green Frame: Metering complete -Yellow Frame: Focusing difficulty Indicator Basic Functions Pressing Fully Pressing the shutter button down fully activates the shutter and causes one shutter sound to sound. • While the image is being recorded to the CF card, the indicator flashes green. • AF-assist Beam -The AF-assist Beam will sometimes emit when the shutter button is pressed halfway to assist focusing in certain conditions, i.e., dark conditions. -The AF-assist Beam can be turned off (p. 118). If animals are your subject, turn off the beam when shooting in the dark to avoid startling them (this may however, make it more difficult for the camera to focus). Basic Functions Using the Zoom The zoom can be adjusted from 35 mm to 70 mm in 35 mm film equivalent terms. Telephoto/Wide Angle • Press the zoom lever toward to zoom in (telephoto). • Press the zoom lever toward to zoom out (wide angle). Digital Zoom When the LCD monitor is on, you can shoot with a combined optical and digital zoom factor of up to 5.0 (p. 50). • The digital zoom is unavailable in some modes (p. 74). • Please note that the image appears grainier, the more the image is digitally zoomed. Basic Functions Selecting Menus and Settings Menus are used to adjust shooting and replay settings. The procedures for using menus are shown below. For a complete list of the settings and options, please see Menu Settings and Factory Defaults (p. 40). • Press the button. • When the mode switch is set to or . • When the mode switch is set to . • Use the or buttons to select the Rec., Play or Set up menu. • Use the or buttons to select an option. • With some Rec./Set up menu items, the or buttons select the options for the items. • With some Play/Set up menu items, a submenu appears after you press the button. • Press the button. Basic Functions Selecting Menus and Settings (Cont’d) Selecting a Mode Selecting a Menu Switching between the Rec., Play and Set up Menus Play Menu Rec. Menu Basic Functions Set up Menu Setting Options Completing the Procedure * You can switch between menus at any time simply by pressing the zoom lever toward or button. • See Print Menu Settings (p. 92) for the procedures used with the (Print Order) item in the Play menu. Basic Functions Menu Settings and Factory Defaults This chart shows the options and default settings for each menu. Menu Item Available Settings Reference Page Rec. Menu (Red) Resolution (Stills) 1600 x1200* / 1024 x 768 / 640 x 480p. 45 Resolution (Movies) 640 x 480 / 320 x 240* / 160 x 120 p. 45 CompressionSuperfine / Fine* / Normal p. 45 ISO Speed 50* / 100 / 200 / 400 / AUTO p. 71 AiAF On*/Off p. 62 Digital Zoom On/Off*p. 50 Self-timer */ p. 52 Image Review Off/2 sec.*/10 sec. p. 44 AF-assist Beam On*/Off p. 118 File No. Reset On/Off* p. 73 Auto Rotate On*/Off p. 72 Long S...