


valutazioni - 0, GPA: 0
(
 )
)
|
Foto e specifiche Olympus FL-14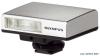 |


Facilità d'uso
MEMO Information for Your Safety IMPORTANT SAFETY INSTRUCTIONS When using your photographic equipment, basic safety precautions should always be followed, including the following: • Read and understand all instructions before using. • Close supervision is necessary when any appliance is used by or near children. Do not leave appliance unattended while in use. • Care must be taken as burns can occur from touching hot parts. • Do not operate if the appliance has been dropped or damaged - until it has been examined by qualified service personnel. • Let appliance cool completely before putting away. • To reduce the risk of electric shock, do not immerse this appliance in water or other liquids. • To reduce the risk of electric shock, do not disassemble this appliance, but take it to qualified service personnel when service or repair work is required. Incorrect reassembly can cause electric shock when the appliance is used subsequently. • The use of an accessory attachment not recommended by the manufacturer may cause a risk of fire, electric shock, or injury to persons. SAVE THESE INSTRUCTIONS Thank you for purchasing this Olympus product. To ensure your safety, please read this instruction manual before use, and keep it handy for future reference. Names of partsp( g (Fig. p )p. 3) 1 Light-emitting area 2 Auto light receptor 3 Lock ring 4 Lock pin 5 TEST button/CHARGE lamp 6 AUTO CHECK lamp 7 MODE button 8 ON/OFF button 9 Flash control mode lamp (TTL-AUTO, AUTO, MANUAL) Preparing a battery ( pg yy)p(sold separately) Use batteries with a choice of followings. • AAA (R03) alkaline batteries (. 2) • AAA (R03) NiMH batteries (. 2) x Notes AAA (R03) manganese batteries cannot be used. Continuous figring The flash may become hot when fi red many times in succession, resulting in damage or malfunction. The flash should be fired no more than 10 times in succession at intervals of at 6 seconds, after which it should be left unused for at least 10 minutes. EN 7 Battery compartment cover +/– polarity. Battery compartment cover +/– polarity. g Loading batteries 1 Open the battery compartment cover. 2 Insert the batteries with correct 3 Close the battery compartment cover. 8 EN g Attaching to the camera x Notes Confirm that both the camera and electronic flash are off. Attaching or removing the electronic flash while either the flash or the camera is on may result in malfunction. 1 Remove the camera hot shoe cover and retract the lock pin by rotating the lock ring as shown (1). • Rotate the lock ring in the direction opposite to that shown by the “..LOCK” arrow until it stops. 2 Slide the flash securely into the hot shoe until it clicks into place (2). 3 Turn the lock ring securely in the direction of “..LOCK” (3). If the camera has an external flash connector, a flash bracket and bracket cable (sold separately) can be hooked up. EN 9 g Turning on the electronic flash Attach an electronic flash to the camera, and then turn the camera on with the flash. 1 Press and hold the ON/OFF button until any lamp lights. • Press the ON/OFF button again to turn the power off. 2 When the CHARGE lamp lights, press the TEST TEST button/ ON/OFF CHARGE lamp button button to fire a test flash. • Replace the batteries if the CHARGE lamp does not light after: • 30 seconds (Alkaline batteries) • 10 seconds (NiMH batteries) • If the CHARGE lamp and AUTO CHECK lamp blink simultaneously, batteries are running low. Replace the batteries. • If no operations are performed for about 15 minutes, the flash will enter sleep mode to save power. The flash will also enter sleep mode whenever the camera enters sleep mode. If no operations are performed for approximately 15 minutes more, the flash will turn off automatically. Press the ON/OFF button to turn it on. 10 EN g ( )Shooting (TTL-AUTO) In TTL-AUTO mode, the flash intensity is controlled automatically according to the camera settings (ISO sensitivity and aperture value). Use this mode if the camera is equipped with communication capability. 1 Press the MODE button of the electronic flash repeatedly to set the flash control mode to [TTL AUTO]. 2 By using the “Available shooting range” (Table p. 4) MODE button as a guide, determine the distance to the subject and then shoot. • When flash activation has been performed correctly, the AUTO CHECK lamp blinks for about 5 seconds after the shooting. x Notes Some flash control modes are not available depending on camera settings or currently selected shooting modes. It is not possible to select unavailable modes. EN 11 g ()Shooting (AUTO)Shooting (AUTO) In AUTO mode, the auto light receptor adjusts adequate lighting for subject, and light is emitted according to the camera settings (ISO sensitivity and aperture value). No pre-fl ash is used, and release time lag is reduced. 1 Press the MODE button of the electronic flash repeatedly to set the fl ash control mode to [AUTO]. 2 Use “Available shooting range” (Table p. 4) as a guide to fix the distance to the subje...
Questo manuale è adatto anche per i modelli :Telecamere - FL‑14 (1.47 mb)