


valutazioni - 3, GPA: 4.3
(

 )
)
|
Foto e specifiche Hyundai H-2203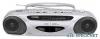 |


Facilità d'uso
You will obtain the wondrous audio effect. TAPE TO TAPE RECORDING • Set the Function switch to TAPE position thus the Power LED indicator should light up. • Insert a pre-recorded cassette into deck “A” and a blank cassette into deck “B”. • Press the RECORD button and PAUSE button on deck “B” simultaneously. • Press the PLAY button on deck “A”. • Release the PAUSE button on deck “B” to start recording. Then both cassettes will start and dubbing at normal speed. NOTE: • Press the PAUSE button on deck “B” to pause the tape recording. • Press the STOP/EJECT button on deck “A” when the recording is finished. • Set the Dubbing Mode switch to “HI” position if you wish to activate high-speed copying function. This will reduce the recording time to about half. NOTE: • Do not reset DUBBING SPEED selector during dubbing. • When the length of tape A is shorter than tape B, PLAY button of deck A is released automatically. But as RECORD button and PLAY button of deck B are still being kept pressed, you have to press STOP / EJECT button to terminate the dubbing operation. • When the length of tape B is shorter than tape A, RECORD button and PLAY button of deck B are release automatically at the end of tape B. But tape A will continue to playback until it reaches its end. RECORDING FROM RADIO • Set the Function switch to RADIO position thus the Power LED indicator should light up. • Tune to the desired station by turning the Tuning control regulator. • Insert a blank cassette into deck “B”. • To start recording press the PLAY button and RECORD button on deck “A” simultaneously. • Press the STOP/EJECT button when finished. 6 NOTE: • You may want to monitor playback during recording. You can adjust the sound with the VOLUME control. This adjustment does not affect the content of recording • Sometimes when recording from AM you may hear a whistling noise due to interference. Set the FM MODE to a different position to step down such interference RECORDING WITH BUILT-IN MICROPHONE • Set the Function switch to TAPE position thus the Power LED indicator should light up. • Insert a blank cassette into deck “B”. • To start recording press the PLAY button and RECORD button on deck “B” simultaneously. • Press the STOP/EJECT button when finished. NOTE: • Monitoring during MICROPHONE recording is not possible MAINTENENCE AND CARE • Check your batteries regularly, old or discharged batteries should be replaced. If the unit is not going to be used for some time or is being run exclusively on the alternative power, remove the batteries to avoid leakage and damage. • Electronic products of this kind should never be subjected to moisture or extreme temperatures. • If necessary, clean the unit with a piece of cloth dampened with water only (be sure the AC power cord is disconnected from the power supply). • The heads and capstan are in constant contact with the moving tape. Use a small cotton bud with alcohol or special tape head cleaner to clean these parts. Never touch the heads with anything metallic. ERASE PROTECTION • To prevent accidental erasing of a cassette, simply break off the two plastic tabs located on the cassette tape’s rear side. • When a cassette with removed plastic tabs is inserted, the recording button cannot be pressed. • If a cassette is to be erased and re-recorded at a later stage, simply cover the holes on the cassette where the tabs were removed, with a piece of strong adhesive tape. 7 SPECIAL FEATURES AUTOMATIC STOP During playback or recording, the unit will shut itself off automatically at the end of tape. AUTOMATIC LEVEL CONTROL (ALC) The unit incorporates with built-in ALC circuitry which automatically adjust the optimum recording level without overloading during recording or dubbing. TROUBLESHOOTING Carefully re-read the instructions to make sure the unit is being operated properly. Check the following before you take your unit to the local dealer for repair. SYMPTOM CAUSE There is no sound from the speakers. - Headphones are connected to the unit. - The Volume control is set too low. The radio does not work The FUNCTION switch is in the TAPE position There is excessive static during FM reception. The antenna is not properly positioned A cassette cannot be inserted into the compartment. The tape is inserted in the wrong direction. The PLAY button does not lock in position after inserting cassette tape The tape is at its end and auto-stop function is in operation. The RECORD button cannot be pressed down with a cassette tape inside. A tape with its safety tab removed has been inserted. The TAPE does not play The PAUSE button is depressed. The sound is weak or distorted during tape playback. The record/playback head is dirty. A previous recording cannot be completely erased. The erase head is dirty. If you find the unit is not working properly after checking the above chart, please take it to your nearest Services Center. Do not attempt to repair it by y...