


valutazioni - 1, GPA: 5
(
 )
)
)
|
Foto e specifiche Sony CMT-LS1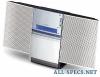 |


Facilità d'uso
26 Connecting external antennas ................. 26 Additional Information Precautions .............................................. 27 Troubleshooting ...................................... 28 Specifications .......................................... 30 Index ........................................... back cover Getting Started Getting Started Step 1: Hooking up the system Perform the following procedures 1 to 6 to hook up your system using the supplied cords and accessories. Left speakerRight speaker FM antenna AM loop antenna 1 Attach the unit to the supplied desktop stand with the supplied screws (M4 . 14). After mounting the unit on the stand, be certain to pass the power cord through the groove of the stand. If the stand is set up without passing the power cord through the groove, the weight of the unit will damage the power cord, which could lead to electric shock or fire. Notes • Be sure to attach the unit to the stand. • Either mount both the left and right speakers, or remove both of the speakers. Do not use the system with only one speaker mounted. 2 Attach the speakers. 4 Connect the AM antenna. Attach the speaker with the R cord to the Set up the AM loop antenna, then connect it. Getting Started right side, and the speaker with the L cord to the left side as viewed from the front of the unit. White Red AM loop antenna 3 Connect the speakers. Connect the speaker cords to the SPEAKER jacks as shown below. Notes • Keep the speaker cords away from the antennas to prevent noise. • Be sure to connect both left and right speakers. Otherwise, the sound will not be heard. 5 Connect the FM antenna. Jack type A Extend the FM lead antenna horizontally Jack type B Extend the FM lead antenna horizontally continued Step 1: Hooking up the system (continued) 6 Connect the AC power cord to a wall outlet after you complete all the connections. 7 To use the remote, pull out the insulating sheet to allow power to flow from the battery. The remote already contains a battery. To connect optional components See “Optional Components” on page 24. To detach the speakers Slide the speakers in the direction of the arrows as shown below. To protect the jacks on the top of the unit from dust Use the dust caps (supplied). See “Connecting audio components” on page 24. Using the wall hanging bracket You can hang the unit on the wall using the supplied wall hanging adapter and bracket. The screws for attaching the wall hanging bracket to the wall are not supplied. When installing the bracket by yourself, be sure to use screws appropriate for the type of wall. Sony cannot be held responsible for any damages or injury due to installation. Safety precautions • The supplied adapter and bracket are for use with the Sony Compact Component System CMT-LS1 only. Using these items for purposes other than to hang the unit on the wall may result in accidents. • The component system CMT-LS1 (7.5 kg), the wall hanging adapter (0.5 kg) and the wall hanging bracket (0.5 kg) have a combined weight of 8.5 kg. Therefore, for safety reasons, the bracket should be attached securely to a wall made from materials capable of supporting a load of 50 kg or more. • When you hang the unit on the wall, make sure the left and right speakers are both attached or both detached. Attaching one speaker without the other may cause the unit to drop and injure someone. Preparation • The screws for attaching the wall hanging bracket to the wall are not supplied. Be sure to purchase screws suited to the wall materials. • If the wall materials cannot support a load of 50 kg or more, be sure to reinforce the wall. To hang the unit on the wall 4 Attach the speaker with the R cord to the right side as viewed from the front 1 Attach the wall hanging adapter to the of the unit. unit with the supplied screws (M4 . 14). Getting Started 5 Connect the R cord to the SPEAKER jack, pass the R cord through the groove between the wall hanging adapter and the bracket as shown below. 2 Fix the wall hanging bracket to the wall using screws (not supplied). Note Be sure to secure the bracket in a level position. 3 Attach the wall hanging adapter to the wall hanging bracket which you have fixed to the wall. continued Step 1: Hooking up the system (continued) 6 Connect the L cord to the SPEAKER jack as shown below. 7 Attach the speaker with the L cord to the left side as viewed from the front of the unit. Replacing the battery in the remote 1 Slide out and remove the battery case. 2 Insert a new lithium battery CR2025 with the + side facing up. a lithium battery CR2025 3 Slide the battery case back in. Battery life You can expect the remote to operate for about 6 months (using a Sony CR2025 lithium battery) before the battery run down. When the battery no longer operates the remote, replace the battery with a new one. To avoid battery leakage If you are not going to use the remote for a long time, remove the battery to avoid damage caused by corrosion from battery leakage. Notes on lith...