


valutazioni - 3, GPA: 4.3
(

 )
)
|
Foto e specifiche Denon DP-29F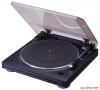 |


Facilità d'uso
• Only let a qualified professional repair or reassemble the turntable. An unauthorized person might touch the internal parts and receive a serious electric shock. • Never allow a child to put anything, especially metal, into the turntable. Protect the turntable too • Use only a household AC power source. Never use a DC power source. • If water is spilled on the turntable, disconnect it and call your dealer. • Make sure that the turntable is well ventilated and away from direct sunlight. • To avoid damage to the internal circuits and the external surface, keep it away from heat (stoves, etc.). • Avoid using spray type insecticide near the turntable it can damage the finish and might ignite suddenly. • To avoid damaging the finish, never use paint thinner or other similar chemicals to clean the turntable. • Place the turntable on a flat and solid surface. • If you don’t plan to use the turntable for a long period of time, disconnect the power cord. • To protect the insulators, always lift the turntable when you move it. And before moving the turntable, disconnect all the connecting cables. • When transporting the turntable over a long distance, place it in its original box wrapped in protective wrappers. 5 ENGLISH 2 BEFORE USING THE TURNTABLE ENGLISH 2 BEFORE USING THE TURNTABLE Rubber mat • The drive belt is fitted under the platter. When assembling the player, please handle the drive belt with care. • Remove all packing materials attached to the tone arm, except that on the stylus, and then open the dust cover and assemble. Remove the stylus cover after assembling. 1 Hold the platter by the holes at its outer surface, and then carefully lower the platter so that the center spindle enters the center hole. Rotate the platter until one of its outer openings is aligned with the driving roller. (Refer to illustration.) 2 Gently grasp and pull at the ribbon tape of the drive belt that is would under the turntable, and then extend the belt around the driving roller. (After attaching, remove the ribbon tape.) In order to make sure that the drive belt has been correctly fitted, slowly rotate the platter 3 or 4 turns. 3 Place the rubber mat on the platter. IMPORTANT! Please Check. Check that the drive belt and ribbon tape have been attached under the platter. Grasp the ribbon tape as shown in the illustration to the left, and extend it onto the driving roller. Spindle Ribbon tape Driving roller Drive belt Equalizer Amplifier switch This unit has built-in RIAA equalizer amplifier, so it can be connected to an amplifier without PHONO (turntable) input jack. According to the amplifier, set the EQUALIZER AMPLIFIER SWITCH. When the unit is connected to the PHONO (MM) jacks: Rear panel of the amplifier L R PHONOON OFF White Red When the unit is connected to the AUX jacks, etc: Rear panel of the amplifier L R AUXON OFF White Red 6 ENGLISH ENGLISH Before beginning • Turn off components. • To prevent damage to cords, connect and disconnect by holding • Connect the power cord last. the plug, not the cord. • Connect everything securely. Loose connections can lead to • Make sure that you connect the white PIN-plug to the left (Ldistortion. white) jack and the red PIN-plug to the right (R-red) jack. Power cord and plug Left (White) and Right (Red) out PIN-plugs Ground wire Connections DP-29F Amplifier SIGNAL GND 1 2 SYSTEM CONNECTOR L R SPEAKER SYSTEM SPEAKER IMPEDANCE 4 16 CD DVD/AUX TUNER PHONO TAPE MD AUX-2 TAPE MD PB REC INPUTS L R L R 13 2 1 Connect the Left and Right PIN-plugs of the turntable’s output cord to your amplifier’s PHONO jacks etc. 2 Connect the ground wire of the turntable to your amplifier’s SIGNAL GND (Ground) terminal securely. 3 After all connections have been made. • Connect the turntable’s power cord to the AC OUTLET of your stereo amplifier, optional audio timer or directly to a household AC outlet. NOTE: • If the platter starts rotating when the power cord is connected, press the STOP button once. 7 ENGLISH 4 CONTROLS ENGLISH 4 CONTROLS r !4 !3!2 !1 !0oiu yt q Dust cover w Dust cover hinge e 45 rpm adaptor and holder r Equalizer amplifier switch t Finger lever y Size select lever u STOP button • To stop playback. i START button • To start playback. o Cartridge !0 Tone arm rest • Holds the tone arm. !1 Platter !2 Spindle !3 Rubber mat !4 SPEED button (33 . / 45 . ) • To select the playback speed. 5 RECORD PLAYBACK Before beginning • Turn on all the components. • Set your amplifier’s input selector to PHONO or AUX. • Remove the stylus cover before playback. • Use the provided 45 rpm adaptor when playing back 17 cm records (provided the center hole is a large one). 12 43 8 ENGLISH ENGLISH Open the dust cover and place the record you wish to playback on the platter. 2 Set the SPEED button according to the record playback speed. • 33-1/3 rpm record.......................................Set to 33 . • 45 rpm record.............................................Set to 45 . 3 Set the selector lever according to t...