


valutazioni - 3, GPA: 4
(

 )
)
|
Foto e specifiche Sony DCR-SX15E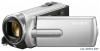 |


da questo dispositivo ha anche altre istruzioni :


Facilità d'uso
66). . Tips . Only the information of the medium selected on [MOVIE MEDIA SET] (p. 17) is displayed. Change the medium setting if necessary (DCR-SR15E/SR20E). MEDIA FORMAT Formatting deletes all the movies and photos to recover recordable free space. Select [YES] .[YES] . . DCR-SR15E/SR20E: Select the recording media to be formatted. . Notes . Connect your camcorder to the wall outlet (wall socket) using AC Adaptor supplied for this operation (p. 13). . To avoid the loss of important images, you should save them before formatting the recording media. . Protected movies and photos will also be GBdeleted. . While [Executing…] is displayed, do not close the LCD screen, operate the buttons on the camcorder, disconnect the AC Adaptor, or eject the memory card from your camcorder (The access lamp is lit or flashing while formatting memory card.). To prevent data on the internal recording media from being recovered (DCR-SR15E/SR20E) [EMPTY] allows you to write unintelligible data onto the internal recording media of the camcorder. In this way it may become more difficult to recover any original data. When you dispose of or transfer the camcorder, it is recommended that you perform [EMPTY]. When the internal recording media is selected on the [MEDIA FORMAT] screen, select [EMPTY]. . Notes . Connect the AC Adaptor to the wall outlet (wall socket). You cannot perform [EMPTY] unless you connect the AC Adaptor to the wall outlet (wall socket). . To avoid the loss of important images, they should be saved on a computer or other devices before performing [EMPTY]. . Disconnect all cables except the AC Adaptor. Do not disconnect the AC Adaptor during the operation. . While deleting data, do not apply any vibrations or shocks to your camcorder. . Confirm the actual time required to delete data on the LCD screen. . If you stop performing [EMPTY] while [Executing…] appears, be sure to complete the operation by performing [MEDIA FORMAT] (Other setup items) or [EMPTY] when you use the camcorder next See “Using menus” (p. 53) on the operation. time. The default settings are marked with .. REPAIR IMG.DB F. SOUND/DISP SET See page 73, 76. .VOLUME You can adjust the volume of playback sound by selecting / . .BEEP .ON A melody sounds when you start/stop recording, or press the center of the multi- selector to confirm. OFF Cancels the melody. . LCD BRIGHT You can adjust the brightness of the LCD screen by selecting / . . Tips . This adjustment does not affect the recorded images in any way. . LCD BL LEVEL (LCD backlight level) You can select the brightness of the LCD screen’s backlight. .NORMAL Standard brightness. BRIGHT Brightens the LCD screen. . Notes . When you connect your camcorder to the wall outlet (wall socket) using the supplied AC Adaptor, [BRIGHT] is automatically selected for the setting. . When you select [BRIGHT], battery life is slightly reduced during recording. . If you open the LCD panel 180 degrees to face GB 7 Customizing camcorder the screen outside and close the LCD panel to the camcorder body, the setting becomes [NORMAL] automatically. . Tips . This adjustment does not affect the recorded images in any way. . LCD COLOR You can adjust the color of the LCD screen by selecting / . . Tips . This adjustment does not affect the recorded images in any way. . DISPLAY SET You can set the duration of displaying the icons or indicators on the LCD screen. . AUTO Displays for about 3 seconds. ON Always displays. OUTPUT SETTINGS .TV TYPE See page 33. . DISP OUTPUT (Display output) You can set where the screen displays are to be output. . LCD PANEL Shows displays such as the time code on the LCD screen. V-OUT/PANEL Shows displays such as the time code on the LCD screen, and on the TV screen. CLOCK/ LANG . CLOCK SET See page 14. . AREA SET You can adjust a time difference without stopping the clock. Set your local area when using your camcorder in other time zones. Refer to the world time difference on page 82. . SUMMERTIME You can change this setting without stopping the clock. Set to [ON] to move the time forward 1 hour. . OFF Does not set the summertime. ON Sets the summertime. . LANGUAGE SET You can select the language to be used on the LCD screen. . Tips . Your camcorder offers [ENG[SIMP]] (simplified English) for when you cannot find your native tongue among the options. POWER SETTINGS . A.SHUT OFF (Auto shut off ) You can set your camcorder to turn off automatically when you do not operate your camcorder for more than about 5 minutes. . 5min The camcorder turns off automatically. GB 8 NEVER . DROP SENSOR (DCR-SR15E/SR20E) NEVER . DROP SENSOR (DCR-SR15E/SR20E) Your camcorder detects that it is dropping, automatically. and protects the internal hard disk. .ON Notes Activates the drop sensor. When it is detected When you connect your camcorder to a . . that the camcorder is dropping, you may wall outlet (wall socket), [A.SHUT OFF] is not be able to record or play back images automatically set to [NEVER]. OTHER SETTINGS ...
Questo manuale è adatto anche per i modelli :Videocamere - DCR-SX20E (3.93 mb)
Videocamere - DCR-SR15E (3.93 mb)
Videocamere - DCR-SR20E (3.93 mb)